Patriot can be configured to launch an external program designed to perform custom billing calculations.
It is recommended that external billing integrations follow a two-step process for handling custom billing.
In the first step, data is queried from the Patriot system, and the desired invoices are calculated. These invoices are stored back into Patriot, but are not yet sent to the accounting package.
In the second step, the invoices generated in step one are sent to the accounting package.
Invoices are generated into Patriot as a single 'batch' containing all the invoices that were generated from that run of the billing program.
This two-step process has several benefits:
Follow the information in Billing Charges to configure your charges such as client charges, work order charges, and/or activation charges.
Open System -> Tasks -> Task Settings
See Task Settings for general information on setting up a task.
Add a new task, and select 'Billing External' from the drop-down menu. Click next to continue to the task settings.
Enter a Description of the task.
The Task No. will default to the next free task number.
Select the Computer that this task is to be run on. This will default to the computer you are currently on.
Enter a System Account No. The system account number is used to log error and system generated signals against. This should default to BILL000101, if it hasn't, enter this in now. If this account does not already exist you will need to set it up as a template.
Enter the path to the invoice batch generation command as Batch Generation Command. Any required arguments for the batch generation program can be entered in Batch Generation Arguments. Common / global arguments can be configured here, and batch-specific arguments can be entered in the batch definition settings (see below)
Enter the path to the invoice batch committing command as Batch Commit Command. Any required arguments for the batch commit program can be entered in Batch Commit Arguments
Open Billing -> Billing -> Batch Setup & Run
Add a new batch definition, and select 'External Billing' from the drop-down.
Manual Batches
Manual batches are only run when the 'Run Batch' command is used, and a start/end date are entered directly.
Automatic Batches
Automatic batches are run automatically at preset intervals. Enter in the start date and frequency, and the report will run automatically.
Authorised
If a batch is authorised, it will be committed automatically after being generated by the generator program. If a batch is not authorised, it will require manual authorisation from Billing -> Billing -> Billing Batch Runs after being generated, before it is committed to the accounting system.
Task
Select the configured external billing task above, which contains the command configuration.
Command Arguments
Additional batch-specific arguments to use when generating the batch. These arguments will be combined with the task arguments configured above when running the batch generator program.
Note: Batch-specific arguments for committing a batch are not currently supported. It is recommended instead for the batch generator to store any required data inside the batch itself when it is created.
When entering command arguments in the task settings or batch setup, placeholders can be entered which will be replaced with the appropriate values when running the program.
Batch Generation Arguments
Batch Commit Arguments
Examples:
Generate Command: MyBatchGenerator.exe
Generate Arguments: --mode dealerBilling --begin-date {startDate:dd-MM-yyyy} --end-date {endDate:dd-MM-yyyy}
Commit Command: MyBatchCommitter.exe
Commit Arguments: --commit --batch {batchID}
Once the setup is configured, batches can be run.
Automatic batches will be run at preset intervals automatically, and manual batches can be run on demand.
When a batch is run, the Patriot task will execute the configured billing command, using the arguments / placeholders configured above.
After the batch generation program saves the batch of invoices to Patriot, they can be viewed from Billing -> Billing -> Batch Runs.
If the batch was authorised, Patriot will automatically run the configured batch committing command, otherwise the batch can be authorised manually from the Batch Runs screen.
Any failed invoices or problems can also be viewed from this screen.
Patriot have pre-built integration programs for some common accounting systems, which can be used as the custom programs in the above setup.
These integration programs are designed to be easily customisable for the specific requirements of your billing system processes.
Contact Patriot support for more information on using these pre-built programs or for advice on building your own custom billing programs to integrate with the Patriot accounting APIs.
Xero is a cloud based system that provides a comprehensive but easy to use accounting and bookkeeping functions suitable for organisations that have a relatively low volume of transactions. For instance a monitoring business with several hundred bureau customers that sends out a thousand or less invoices monthly. Xero has quickly gained global recognition as a benchmark for small business software.
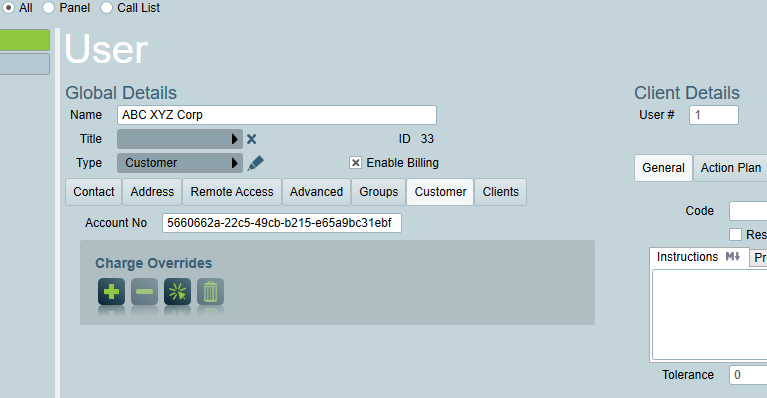
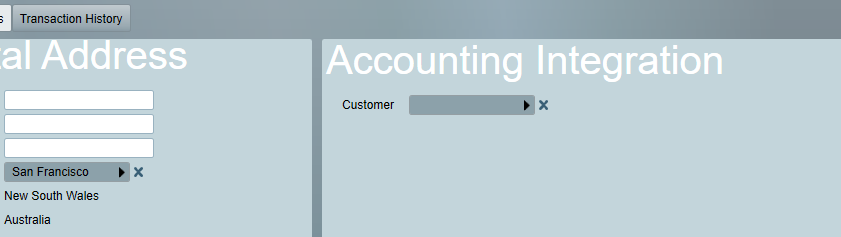
In the billing section of System Wide Settings make sure the standard billing mode explicitly is set so that billing customers can be assigned for charges. A billing customer is simply any user that has the "Enable Billing" checkbox set. When this check box is set the customer tab will appear on the user's record. Customers in Patriot should be reflected in the in Xero as a contact.
A customer in Patriot does not necessarily have to be assigned to a client site. However at least one customer needs to be assigned the default customer field on the client site billing tab as this is used as the customer to be billed during automatically during charge transaction generation.
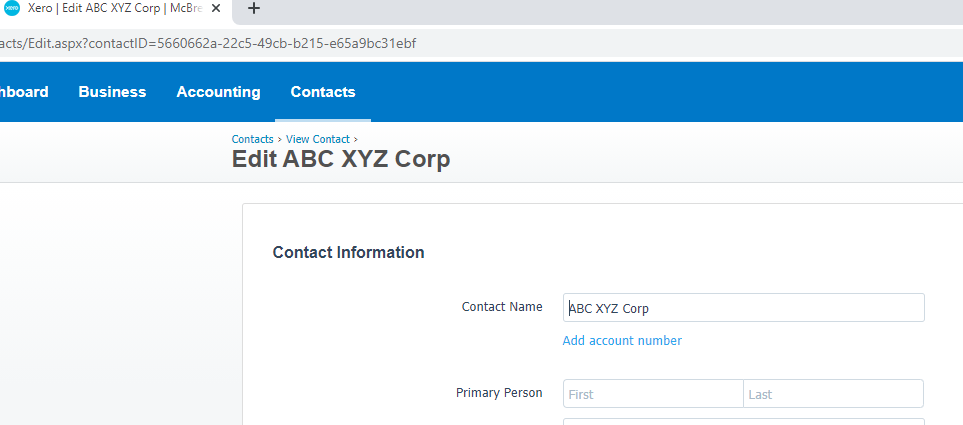
The account number field (Account No) on the Patriot Users Customer tab is used to link the Patriot User to the Xero customer contact. To get the link open the contact in Xero and copy the contactID from the Xero contact URL address
The product and ledger codes can be used to link Patriot Master Charges to item code in Xero Products and Services.
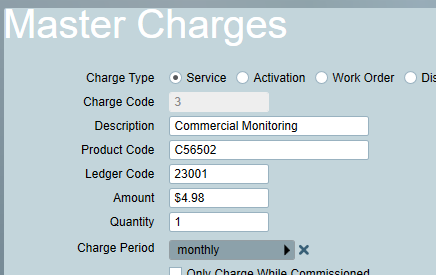
In a similar way the ledger code is used to specify the Xero general ledger code for posting sales figures from invoices (i.e. Debit the customer Credit the Sales Revenue General ledger account).
The Patriot billing interface that connects to your billing system in this case Xero is driven by a separate utility program. If you have purchased a copy of the Xero billing module you will receive from Patriot the Xero utility program which provides the connection between Patriot and Xero. Run the windows installer provided. Note the installation of this interface will usually be carried out by Patriot support as it involves a number technical steps and diagnostics to get the necessary information. The program comes with a sample DLL which can be modified to get the desired customization.
xero uses a two factor authentication.
Installation
Authentication
Using your Xero credentials (Administrator) sign in to the [Xero Developer Portal](https://developer.xero.com) and select 'My Apps'
Create a new App with the following details:-
App Name: Can be anything, but must be unique.
Company URL: your company public URL
OAuth2.0 Redirect URI: http://localhost:5001/ (can change port as required). Trailing slash is mandatory here.
Then take a copy the Client ID and Client Secret.
Rename applicationSettings.config.example to applicationSettings.config and edit:
Patriot server: base URL of Patriot server, e.g. https://patriot-server:8002/ .
Note that the Server name and port can be obtained from the Patriot Data Service config file
<setting name="ServerName" serializeAs="String">
<value>Patriot_Server</value>
</setting>
<setting name="APIServerPortNo" serializeAs="String">
<value>8002</value>
</setting>
Patriot login/password: Must be a user account with billing access
Xero client ID/secret: From the Xero app created earlier
From the folder location where the Billing program has been installed (e.g. "C:\Program Files (x86)\Patriot Systems\Patriot Xero Billing Utilities" ) Run `PatriotXeroBilling.exe authorise -p 5001` (change port to match app config above)
This will open your browser and prompt you to log in to the app you created using your Xero credentials.Accept the prompts until the browser redirects back to localhost
Back in the program, select your company/organisation (if required) and check that authentication succeeds.
Once authenticated, the billing utility should remain linked as long as it is used regularly. If authentication errors occur, re-run the authentication command to re-authorise.
Xero Task Set-up Examples
Examples:
Generate Command: C:\Program Files (x86)\Patriot Systems\Patriot Xero Billing Utilities\PatriotXeroBilling.exe
Generate Arguments: generate --plugin "C:\Program Files (x86)\Patriot Systems\Patriot Xero Billing Utilities\PatriotXeroBilling.mycompany.dll" --pluginArguments "7" --batchDefinitionId {batchDefinitionId} --startDate {startDate:yyyy-MM-dd} --endDate {endDate:yyyy-MM-dd}
Commit Command: C:\Program Files (x86)\Patriot Systems\Patriot Xero Billing Utilities\PatriotXeroBilling.exe
Commit Arguments: --commit --batch {batchID}