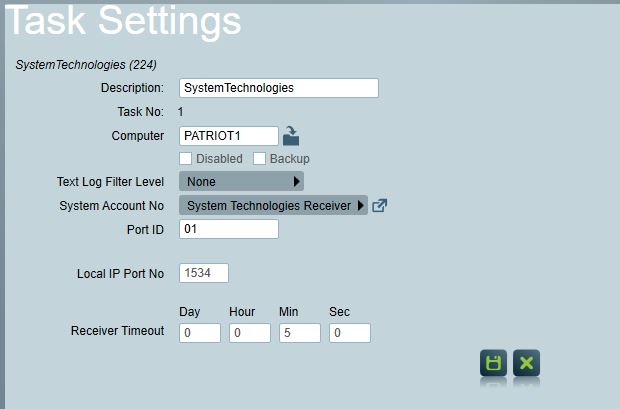
Add a new task to the list in the Task Settings window. Double click on System Technologies in the drop down list in the details area of the window.
Patriot can receive alarm events including verification images, audio and video from SCSI home automation devices via the SCSI cloud server receiver reporting in the System Technologies format.
Each device must be configured to report to the SCSI cloud receiver service. Your account with the SCSI cloud receiver service must be configured with your Patriot server's public static IP address and receiver port (see in Task Setup).
For increased security your external firewall should be configured to only accept connections on the Patriot receiver port from the SCSI cloud receiver service.
Please refer to SCSI home automation device and cloud receiver service documentation for complete configuration information.
System Menu Item -> Tasks -> Task Settings
Please read Task Settings for general information about receiver task configuration.
Add a new task to the list in the Task Settings window. Double click on System Technologies in the drop down list in the details area of the window. |
![]() Click the next
button to continue. The System Technologies receiver task settings form will
appear.
Click the next
button to continue. The System Technologies receiver task settings form will
appear.

Local IP Port No: This is the TCP/IP port that Patriot will use to listen for connections from the SCSI cloud receiver service. You will need to configure port forwarding in your external firewall (NAT) to allow connections to the Patriot Task Service on this port. Your Windows server firewall should also be configured to accept TCP/IP connections on this port.
SCSI devices can send alarm events to Patriot in one of two formats: Contact ID or SIA. You must first find out which format is used by each remote device and then on the Event Types tab check Use Template and select either the Contact ID or SIA format template as appropriate.
SCSI devices can send alarm verification media including images, audio and video along with alarm event signals. If you wish to view this verification media in Patriot as part of the alarm response, you must have the Standard Media Module registered. Each client should be configured on the Zones tab as follows:
Set the Video Storage folder in the System Wide Settings.
The Standard Media Module registered to view or playback alarm verification media.
When responding to an alarm with verification media, the Camera button will be displayed on the activation details screen. Clicking this button will show a list of events related to the activation. If there was an image/video/audio file and/or a URL transmitted along with the the event signal then these will be played back and/or displayed.
As well as being played back during the activation response, verification media can be viewed again later from the client Signal History tab.