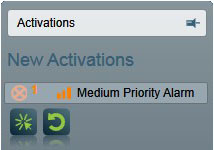
An Activation Report is displayed by double-clicking on an Activation in the signals window or the current activations screen. This area enables operators to deal with all matters concerning an alarm activation. It also keeps a record of all activity related to the alarm signal. Enterprise versions of Patriot also provide an Activations Window to the right hand side, accessible at all times, so that alarm activations can be dealt with quickly and efficiently.


The Patriot 6 Activation Report displays all client information found on the client maintenance section in one easy to use screen, including:
Alarm priority
Type of alarm signal
Activation date and time
Client number and name
Client's location
Attendance number
Date and time the Activation Report was first updated
Options for alarm reason and monitoring/callout charges
Response plan and notes
Contact details in the Response Plan include the contacts name, type, phone, pager, mobile and after hours phone numbers, whether or not the user has been contacted/attended and security details of code and pin numbers. Additionally all recent history can be seen in the lower right hand area of the window and on the lower left there is a quick select option for alarm reason and monitoring/callout charges.

If Password Verification is enabled, upon entering an activation the operator will be prompt with a warning message to confirm the clients OK or Hold up password. The message will continue to display everytime the activation is opened until passwords have been verified.
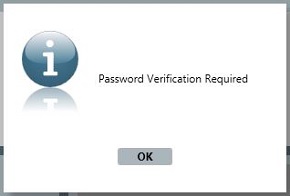
The OK and Hold up passwords can be verified by clicking the tick icon next to the password fields
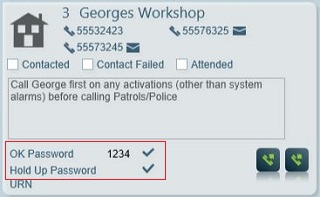
Note: You can only confirm the passwords from the Site Response user.
Once an operator opens an Activation Report their ID is displayed in the operator column of the Current Activations window. They are said to now have 'ownership' of this record. If another operator opens the record, a message appears detailing the operator who last updated 'owns' the Attend Report and asks if you still wish to make changes to it. By choosing Yes the new operator will take ownership of the Attend Report and all of its contents. The report is then marked with the new operator ID replacing the ID of the previous operator.

In a network situation if an Activation Report is currently open, a warning message will be displayed if someone else tries to open it. They may still open it, but any changes made could be overwritten.
When an activation is first picked up by an operator, the operator response
time also gets recorded. The response time is the amount of time between the
activation creation time, and when the operator first picks up the activation.
Putting an activation straight on hold (as you can do from the Current
Activations Window) also sets the response time.
Release an Activation
![]() This button releases ownership of an activation, and returns it to the list of new
activations. The activation response time is reset. An operator response note is created when an
activation is released.
This button releases ownership of an activation, and returns it to the list of new
activations. The activation response time is reset. An operator response note is created when an
activation is released.
If there is more than one activation owned by the same operator for the client, you will be given the option to release all of the assigned activations to new.
All users (such as patrols, technicians, and emergency services) who have been assigned to the Response Plan of the alarm events Action Plan will be displayed in the Response Plan contact list, along with the type of service they are, and their contact details. Check boxes are provided to indicate whether these services have been contacted or not and whether they attended the activation.
Note: If you click on a response member's contact phone number the auto dialler module will automatically dial the number and connect it to your phone or headset. An event is also added to the response notes to record the time the call was placed.
Dispatch instructions that have been entered against site users or global users (e.g. emergency services) will be displayed in the response member's contact card on the right-hand side of the activation screen.
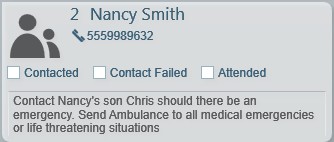
The site response member will typically contain a more detailed instruction set specific to the client, action plan, alarm type and zone. See Response Plans for more details.
 On larger screens, the dispatch instructions can be
expanded using the expander button located at the top of the response plan. The
default behaviour for this expander is controlled by a workstation setting.
New Contact
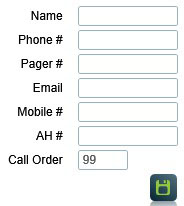
The New contact button allows a new user not already assigned to the client to be displayed in the Response Plan for this Activation Report only. Clicking on the New button brings up the New User window. Enter the required information and click OK. The user will be displayed in the Response Plan list for this activation report only. |
 |
Import Button
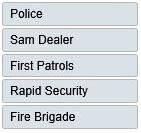
The Import button allows Emergency services not already assigned and site users not assigned to the current response plan to be displayed in the Response Plan list for this Activation Report. Clicking on the Import button opens a window listing users and services either loaded in a specified user template on the clients user tab or in the pool of available users. Highlight the user or services required and double click. The user will be added to the response list for this activation report. |
 |

The Response Notes sub-section window lists all response notes associated with this Activation such as operator comments and system generated reports of call attempts. Each report is time stamped allowing easy tracking of operator responses to activations.
 |
Clicking the New Note button at the bottom left of this window will add a new time stamped report entry allowing any additional comments relating to the activation to be entered. |
The reason for the Activation can be chosen from the drop down list. Click on the arrow at the end of the field to display the list of reasons. These reasons can be customized using the system's Monitor Maintenance menu. Double clicking on a reason will make it appear in the reason field.
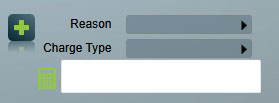
Charge Type
Here, various callout/monitoring charges can also be assigned via the Charge Type drop down menu. For more information see the BILLING section.
 |
To complete the Activation Report, click the Complete Button. The activation report window will close and take you back to the current activations screen, where the signal will be removed. If there are no other activations pending the attend icon will stop flashing and the sounds will cease. |
 |
The Sleep Button allows a pending activation to be removed from the Current Activations Window for a specified period of time. For example, if a low system battery alarm is activated and a technician will fix it in two hours the Activation Report can be put to sleep for 2 and a half hours while it is fixed. When it becomes active again it can be removed if the situation has been remedied. |
To Sleep a Activation:
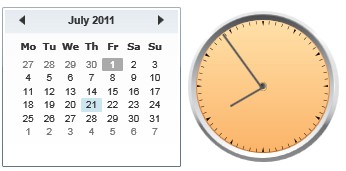
Click the Sleep button to bring up the Sleep until window.
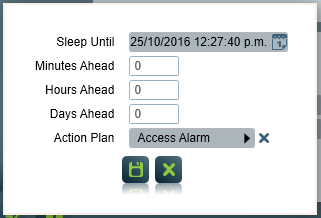
Enter the length of time the Activation Report should be put to sleep for in terms of Minutes, Hours, and Days.
The time that the record will become active is displayed in the Time and Date fields.
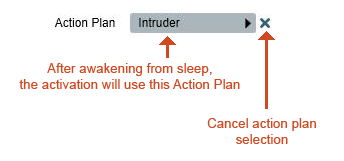
If required, the Activation can be transferred to a lower priority action plan when brought back from sleep.
Click the Save button to save the changes, or the Cancel button to exit without saving.
The record will be removed from the Current Activations window. To view any records that have been put to sleep, click on the Sleep tab in the Current Activations window.
 |
The On Hold Button can be used to put the Activation on hold but keep it in the Current Activations window. The operator can come back to this Activation to make further amendments and complete it when they are satisfied the activation has been resolved. If all current activations are on hold the alarm sounds will cease and the on hold alarm sound will be played as set in the sounds task. If a new Activation comes in the alarm sound will return alerting the operator. |
After an activation has been opened, when new signals come in they will flash momentarily, and a star icon will display next to the signal in the recent history list.

This will help to alert the operator of new events while they have an activation open.
The new activity indicator is cleared each time an activation is placed on hold, or put to sleep.
If more than one pending (including sleeping) Activation exists for a client, including alarms from from multiple areas, the Activation List tab will be displayed. This tab lists the details of all activations including any sleeping Activations.
To view this tab, the operator must have Client Activation List security rights assigned.
From the Activation List Tab:
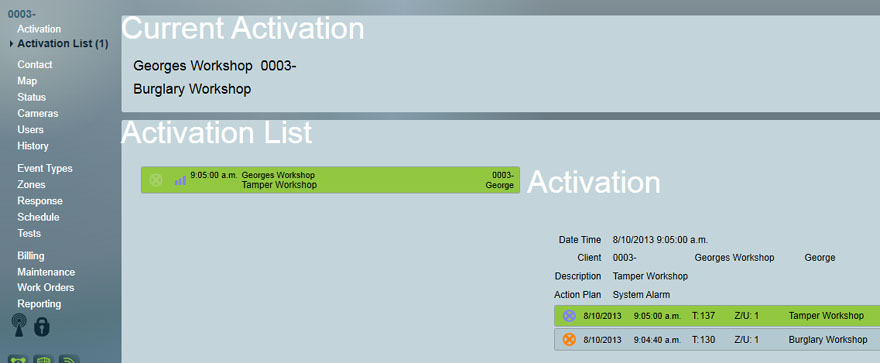
If the Activation List Tab is loaded as when an operator is responding to an alarm then the activation that is loaded will be displayed above the list of other activations for this client.
Double clicking on another Activation will close the client and reopen it with the new Activation loaded into the Activation tab. This allows the operator to respond to a higher priority Activations.
The Activation List tab heading also displays the number of Activations for the client so you can see at a glance how many total Activations have been received. If a new Activation appears that has not been viewed the heading will automatically change to a Red Warning colour.
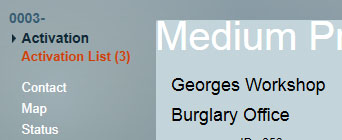
If the client is opened from the client search window and an Activation is pending for this client then the Activation List Tab will be displayed. This makes the operator aware that a pending Activation exists for this client and also allows the operator to quickly select one of the Activations to respond to it. This can be very useful for finding an activation in another area of a client however the operator must have Client Activation List security rights assigned.