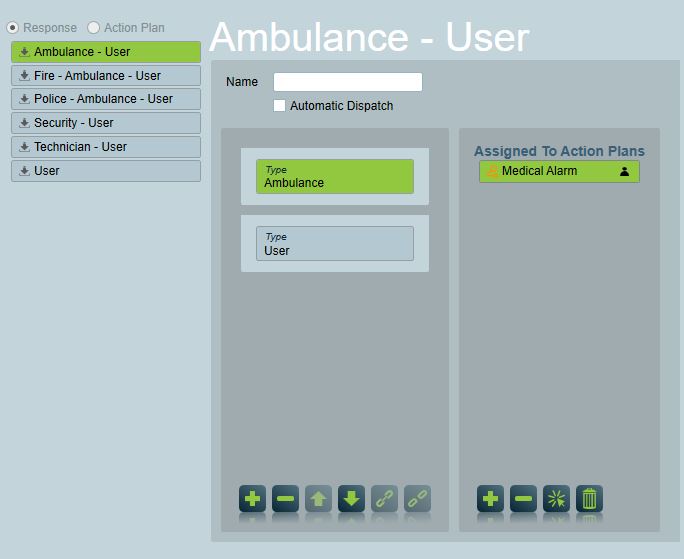
The response tab displays response plans with the associated action plan. The Call List can be overwritten by creating client level response plan assignments.

Response plans originating at the global, client or template level will appear when the Response Plan filter is enabled. Each of these response plans has an Override button visible below the list of response plans. When pressed this button gives you options for overriding the higher level response with a client level response plan assignment.
Both priority and non-priority action plans are listed on the client response tab. In the the response plan preview represents the actual keyholders, guards and other users who will be displayed, in descending Call Order, and along with contact details and instructions in the event of alarm activation. Non-priority action plans on the other hand will never generate an activation in Patriot. Therefore response plans assigned to non-priority action plans will never be "seen" by operators, but they can still be very useful for creating fully automated signal responses using assignable tasks.
When setting up a multi area client, configure your client level response first in the base account and enable the "Share Response" option. Then make sure all area clients have their response linked to the base account, with "Include Base Response" enabled on all the areas. If a particular area needs a customised response, you can easily achieve this by unchecking the Include Base Response option on the response tab of the area client. When overriding the response in this way, make sure that the Include Base Users option is enabled on the Users Tab of the area account. This means that the full complement of site keyholders are available for creating your area level response.
The Response Plans area in the Response Tab of a Client allows response plans to be assigned to an Action Plan at the client level. Client level response plan assignments take precedence over (override) all other levels of response plan assignment (Global, Dealer & Template). See Action Plans for more information about actions plans and their response plan assignments.

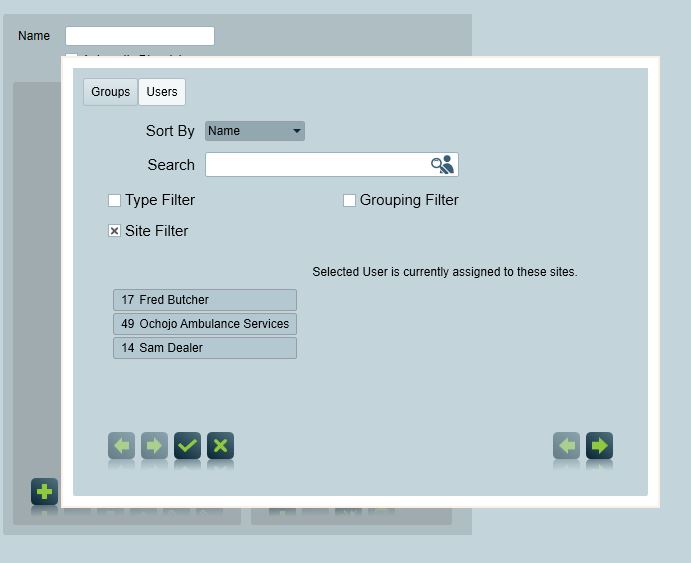
Press the insert button to show the Available User Types and User Groupings popup menu. This displays a list of all user types available and user groupings which have response enabled. Double click on any user type/user grouping in the list to manually assign it to the response plan. You can also choose an individual user to add to the response plan by switching to the other tab in the popup menu labelled as Users. You need to press the 'check' button when assigning a specific user to the response plan. Press the delete button to remove the selected user or service from the response plan.

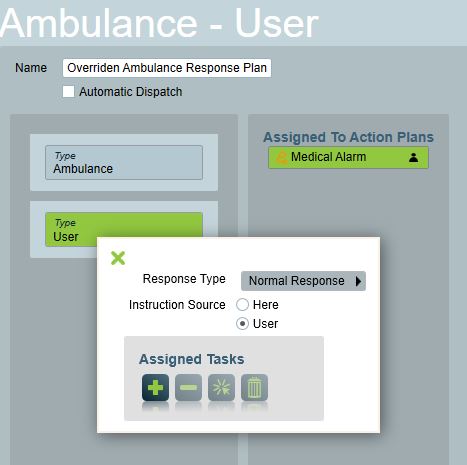
From here you can also change the Response Type option to "Tasks Only" to prevent the member from displaying in the response plan generated when responding to an alarm. This option is useful if a response member's presence is only required for the automated triggering of assignable tasks. You can also set the response type to "Instruction Only", which includes them in the response plan, but they are only displayed as a source of instructions, and the contact controls aren't displayed.
The bottom section of the form is dedicated to the assignment of tasks to response plan members. Double click through on any assigned task for further options.
By clicking the ![]() next
to the override button, will allow you to create a new response plan.
next
to the override button, will allow you to create a new response plan.
This button is primarily for legacy support. If you need to create a new client response plan for a particular action plan(s) the recommended way to do this is by overriding the global response plan already assigned to this action plan(s). If however you cannot do this because no global action plan is assigned to the action plan(s) then you should begin by assigning one globally first in preference to using the insert new client response plan button. By working in this recommended way you should minimise the number of response plans in your system.
The form allows you to switch between User Types tab and the Users tab. Therefore you can choose specific users to assign to the response plan. You also get to assign the response plan to a specific action plan.

This can be edited by switching through the 'Site Instructions' tab (see image)
Instructions that are saved here will appear in users who are of type 'Site'.