Dispatch Patrol Job Setup
Overview
This guide shows how to setup a scheduled site check for a Patrol run - a Digital Runsheet Job.
Selecting Client for Patrol Run
Prerequisites
The Patrol Response module must be registered.
Selecting Client for Patrol Run
Go to the account you wish to create the scheduled site check for and click on the 'Reporting' Tab
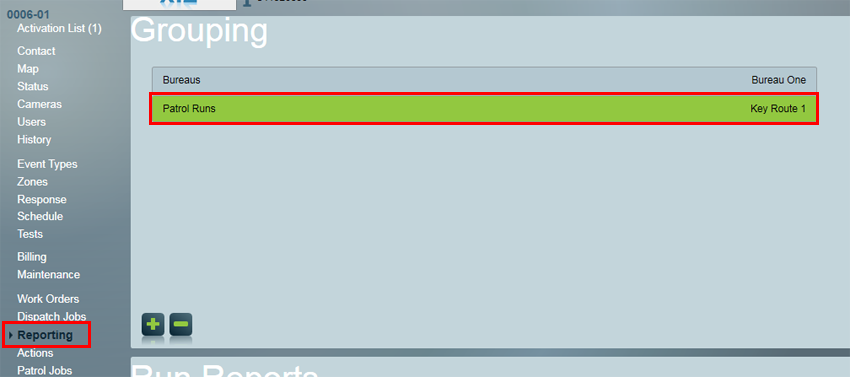
Make sure the account is assigned the correct default Patrol Run group. By default new patrol jobs for this account will be assigned to this run group - but you may override this later when scheduling the account's patrol jobs.
Creating the Job
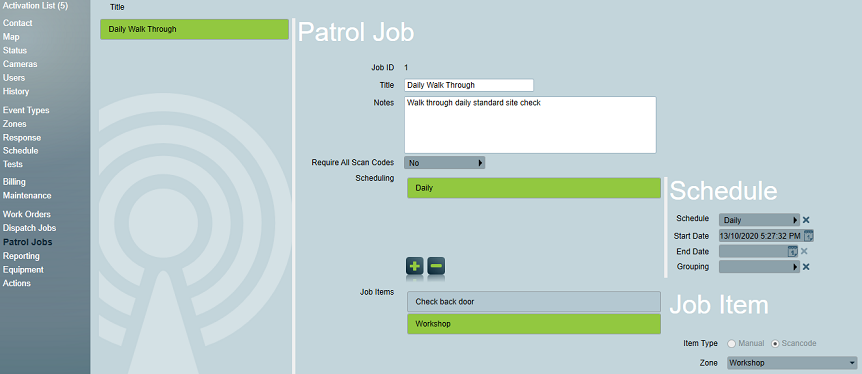
Go to the 'Patrol Jobs' Tab
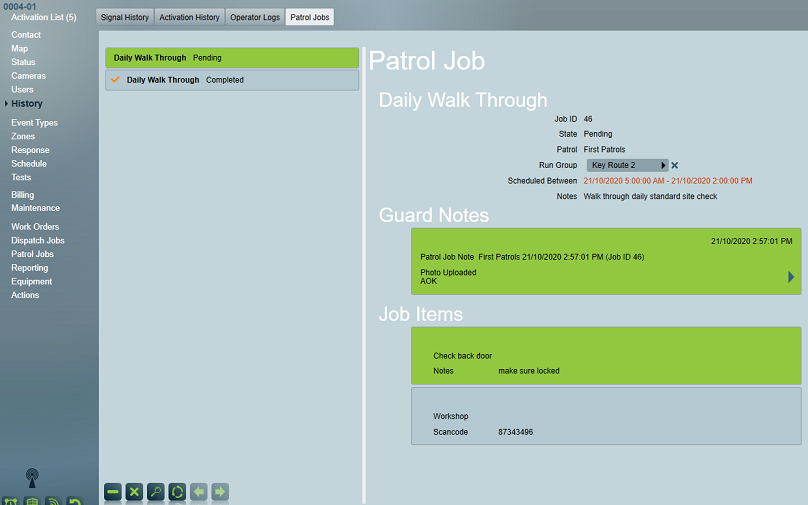
The Patrol Jobs window will show all the scheduled Digital Runsheet jobs for the site. You can have multiple jobs setup for one site.
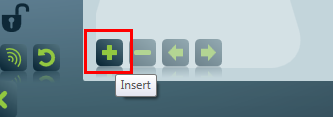
Click the insert button to create a new Scheduled Patrol Job.
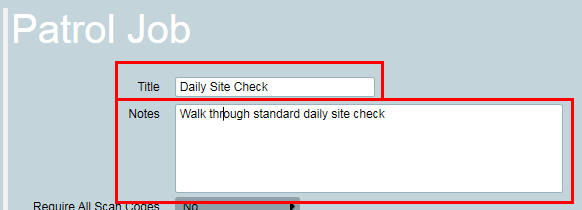
Enter a Title and a basic description that will show up for the Patrol.
If all scan tags are required to be scanned you can select the 'Require All Scan Codes' checkbox. More details on Scan Tags are in the section below.

Insert one or more scheduling items to define when the job should be performed. Each scheduling item you insert gives you the option of overriding the client's default run group by setting a Grouping. This means you have the power to schedule a job to be performed by different patrol runs temporarily or according to a schedule.
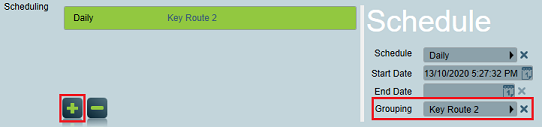
Select or create a schedule for when the Patrol Job is scheduled for and what time it should be completed by. The Patrols digital Runsheet in the APP will show those jobs that are overdue highlighted in red font.
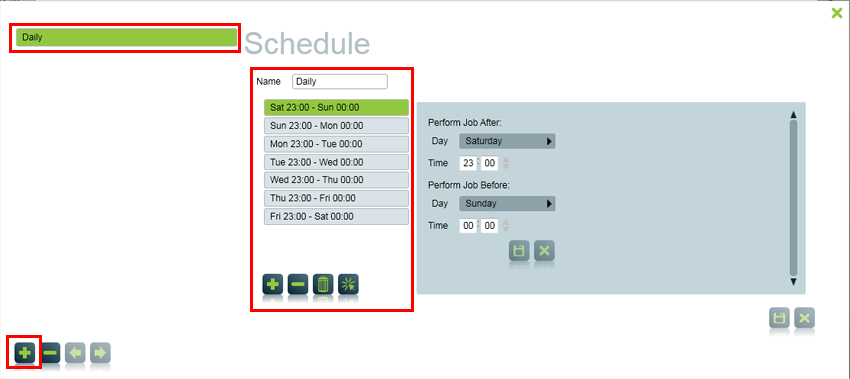
When you create the schedule make sure you click it to select it so it shows in the 'schedule' details.

Select a start time for when the Patrol Job will begin. Enter an end time if the Patrol Job will run for a specific time frame or leave it blank if it will be an ongoing scheduled site check.

We can now enter in the check list items. If the job is very basic or only requires scan tags to be scanned and the 'Require All Scan Codes' option has been checked then no check list items need to be entered.
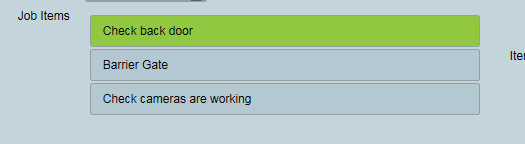
You can enter in as many check list items as you like with headings and detailed notes.
You can add in individual scan tag items.

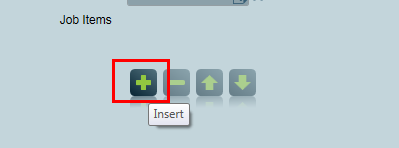
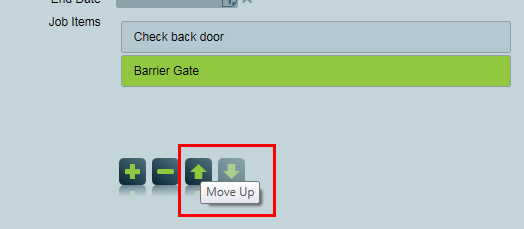
Select and use the position buttons to move check list items up and down the list so they are in the correct order to be completed.
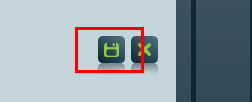
Click the Save button to save and complete the Patrol Job.
NFC, QR, Bluetooth scan tags
To setup Scan Tags go to the 'Zones Tab'
Create anew zone for the Scan Tag and in the zone details add in the scan tag code and select how many times that it needs to be scanned per day.
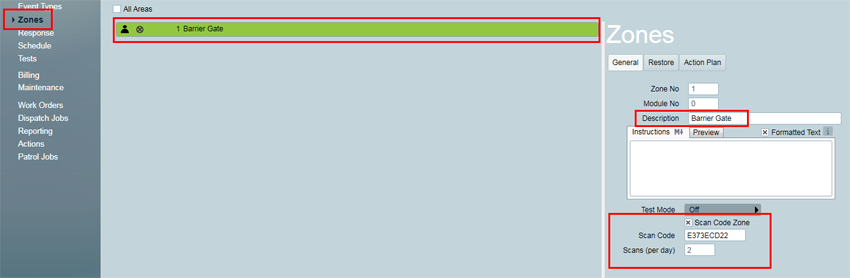
Save the Scan Tag zone and it is now ready to be selected in the Patrol Job.
Patrol Job History
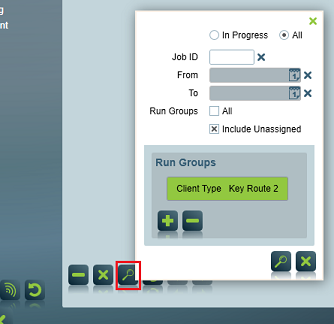
Pending, completed, and cancelled patrol jobs can be viewed from the History tab of any client or globally from the Maintenance -> Clients -> Patrol Jobs menu.
Patrol Job history can be searched and results may be multi-selected to perform job cancellation or deletion.
More Information
For a Patrol guide on how to load a Digital Runsheet and complete Scheduled Site Check Jobs in the Plink APP click the link below
Plink Digital Runsheet Jobs Tutorial
A Digital Runsheet video can be viewed at the link below.