Status Tab
To define status states for your system navigate from: Maintenance Menu Item -> Clients -> Site Status Settings.
Requires 'Edit Client Status' or 'Edit Client' operator security permissions.
Here you can either delete, change or enter new site states according to your system.
Each client (site) can have a current site status. This status level is used to give the operator assistance in responding to alarms at this site. The site status message appears on the Activation Report, and the response plan can be filtered while a client is on a certain status level.
Site Status: used to record the current status for the site. These status levels are user definable.
Expires On: used to record the date the Site Status will expire and return back to normal again.
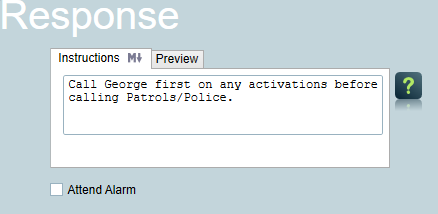
Special requests may be entered here. These are displayed as the dispatch instructions of the Site in response plans.

If you have an Enterprise license, you can also use Markdown tags to format the text of the instructions. For more details, see Formatting Response Instructions.
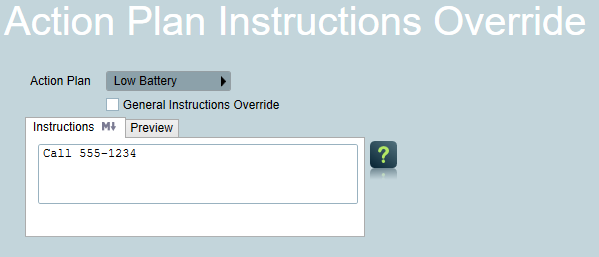
You can also specify site instructions for particular action plans, by going to the Response Tab --> Action Plan Instructions tab, and inserting an override.

General Instructions Override
You may want to override the normal instructions in some situations.
ON: Only the text in the Alternate Instructions box will be used as instructions for this type of alarm.
OFF: The Alternate Instructions will be shown in addition to the normal dispatch instructions.
Any instructions entered for a Base area will also be used by all linked areas. If an area adds an instruction for the same Action Plan as exists in the Base Area, this will override the Base instruction.
Attend Alarm
If the Attend Alarm checkbox is checked, this icon
will appear on the
left of the client window next to the site status icon.