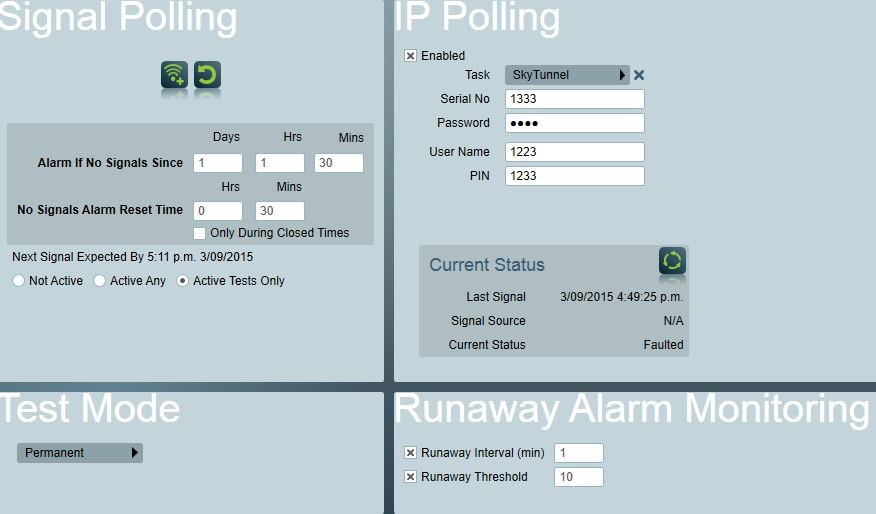
The Signal Polling area of the Tests Tab governs the maximum period of time the computer will accept the fact that no signals have been received from an alarm before issuing a warning. To activate this system, patriot must be set with Auto-Status Monitoring enabled in the Data service settings. this can be found from System -> System Wide settings -> Data service settings tab. Check Auto Status monitoring box.
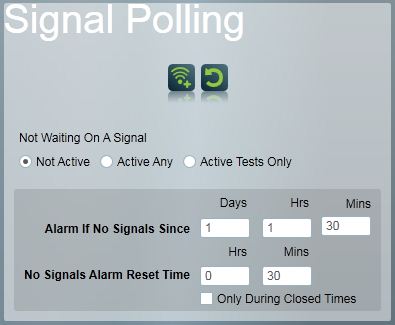
There are two different approaches to activating Signal Polling. Active Any and Active Tests Only.
If No Signals Monitoring is set Active for a client (either for Active Any or Tests Only), the program will check to make sure at least one signal of the type required is received for the period specified in the Alarm If No Signals Since field.
Most client alarm systems connected to your Central Station will regularly be sending either test signals or open and close signals. Patriot 6 can check if signals have been received from such sites within a predefined time frame. This time frame is expressed in Days, Hours, and Minutes and is entered in the Alarm If No Signals Received fields.
In most cases we expect a site to send a test signal at least once every 24 hours. For the No Signals Monitoring to effectively test for 24-hour signals the Alarm If No Signals time frame should be set to 1 Day, 1 Hr, and 30 Mins.
Why do we need 1 hour and 30 minutes more than the 24
hour test signal before the system will detect no signals have been received
and generate an alarm?
The 1 hour is to allow for
the daylight saving changeover as we don’t want a whole lot of alarms to
result from the loss of an hour in the changeover to daylight saving ( this
hour only applies to regions that are covered by a daylight saving regime). It
is also best to have a small buffer in case the alarm communicates slightly
later than expected and to allow for inaccuracy of clocks both in the security
system and the Central Station computer, hence the additional 30 minutes. In
most cases a 10-minute buffer is likely to be sufficient.
If no signals are received for the length of time specified, a signal with the type number 65002 (No Signals Received) will be logged. The templates supplied with Patriot 6 will have this event type included.
Once a No Signals Received (type 65,002) alarm has been triggered, it will continue to be generated at the interval specified by the No Sigs Alarm Reset Time. The alarm will continue to regenerate at each interval until either a signal is received from the alarm, or the next signal expected by time is extended using the Temp No Signals button.
 As described previously, the alarm will continue to be generated
at the interval specified by the No Sigs Alarm Reset Time until a signal is
received from the panel. Once you are aware of the problem and
know the reason you can stop the alarms from being generated by clicking the
Temp No Signals button.
As described previously, the alarm will continue to be generated
at the interval specified by the No Sigs Alarm Reset Time until a signal is
received from the panel. Once you are aware of the problem and
know the reason you can stop the alarms from being generated by clicking the
Temp No Signals button.
When clicked the Update No Signals Alarm Time window appears with the Time being the current time plus the No Sigs Alarm Rest Time. E.g. if it is 1230 hrs and the Reset Time is 30 mins the Time will be 1300. This can then be changed to the date and time the alarm is expected to be set by. Click Save to save changes, or Close to discard changes. If the Time is altered then the new expected signal time will be displayed as the Next Signal Expected By (65002): time and date on the page 2 tab.
 Reset
Reset
If a Temp No Sigs time has been entered but is no longer required, the Reset Signal Polling Temporary changes button can be used to reset the scheduled No Signals Monitoring back to those held on file.
Only During Closed Times
This box is checked if the Man Down facility, for guards, is being used. The system will then only expect to receive signals whilst a guard is on duty. This is a common use for this setting but not exclusively so and could be useful in some advanced scheduling setups. Please refer to MAN DOWN FACILITY documentation for more information
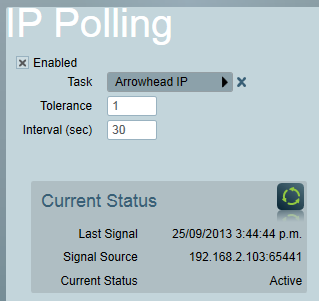
The purpose of IP Polling is to monitor the signalling status (Active or Faulted) of remote IP based alarm hardware including IP alarm panels and IP converter units. IP Polling is a client level setting as opposed to a task level setting - each IP panel or converter unit in communication with a Patriot IP receiver task must be configured individually. This system means that the most critical IP alarm panels can be made to adhere to tighter polling regimes than less critical panels. The amount of IP data traffic generated by polling signals is mininal; in the order of hundreds of bytes per poll for most devices. This level of data traffic is not likely to incur significant cost on a modern ISP contract, and therefore IP alarm equipement is typically configured to send polling signals at a rate near to one poll per minute.
Rather than log each polling signal received from and IP device (which may amount to many hundreds per day), Patriot instead generates a single Polling Failure signal (System Type 65,021) against the client account if the remote device fails to poll as frequently as specified in the IP Polling section of the Client Tests Tab. A Polling Restore signal (System Type 65,020) will likewise be raised against the client if a faulted device resumes polling.
There is a minimum of three settings which need to be entered to enable IP Client Polling:
Task - This is the Patriot IP receiver task receiving signals for this particular account
Tolerance - The number of missed polls allowed before the Polling Failure signal is raised.
Interval - The Interval in seconds within which polling signals must be received. This interval must match that configured in the remote device's firmware.
Note: certain IP receiver tasks will present more options when selected, e.g. a password or encryption key - please see the corresponding receiver task's documentation for task specific information.
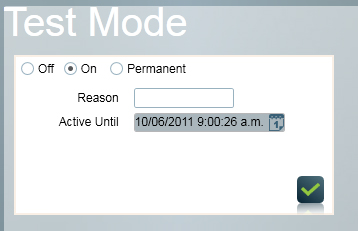
This mode prevents annoying test alarm signals going through the alarm attendance procedures where alarm sounds are generated and attendance reports are required. The signals are still logged, but are all treated as benign signals. Test mode is generally used if a technician is on site, or a zone has gone faulty and you are waiting for the technician to fix it. As a safety precaution the test mode will time out and clear after the number of hours specified in the Test Mode Active Until field. If you wish the test mode to stay active for an infinite number of hours you can do this by checking the Permanent radio button. This will disable the Test Mode Active Until field, not the actual Test Mode option.
The Test Mode option allows alarm type signals for a client account to be disarmed for testing. To activate the test mode for a particular client you must click the Test Mode drop down and select the Test Mode On radio button on the clients Tests Tab.
![]() When Test Mode is On, this Icon will appear in the left
hand area of the Client Window (next to the Site Status and Attend Alarm
Icons)
When Test Mode is On, this Icon will appear in the left
hand area of the Client Window (next to the Site Status and Attend Alarm
Icons)
For more information, see Test Mode.
This section is only visible when Runaway Alarm Monitoring is enabled in the system wide Data Service settings.
Client level Runaway Alarm monitoring settings can be defined by checking one or both of the Runaway Alarm setting checkboxes. If defined, the client level Runaway Alarm settings will override the system wide Runaway Alarm monitoring settings. Refer to System Wide Settings for more information about Ruanaway Alarm monitoring.
Caption:
Overriding the system wide Runaway Alarm monitoring settings at the client level.
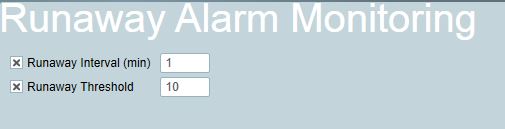
Client runaway alarm settings